
TL;DR
Paint correction before applying PPF or wrap is the process of polishing the vehicle’s painted surface to remove swirl marks, scratches, oxidation, and other defects so that film goes over clean, smooth paint. It prevents visible imperfections from being sealed under the film permanently. Full correction is not always necessary, but surface inspection and preparation are always required. The right level of correction depends on paint condition, film type, vehicle colour, and the owner’s expectations.
The Short Answer
Film protects the surface you give it. PPF and vinyl wraps do not repair paint. They sit over it and preserve whatever condition exists at the time of installation. If that surface has swirl marks, water spots, scratches, or oxidation, the film can trap those defects underneath, making them difficult or impossible to fix without removing the film entirely.
That is the core role of paint correction before applying PPF or wrap: preparing the paint so the final result looks right and stays right.
But here is where most guides get it wrong. They tell you paint correction is mandatory for every vehicle, every time. That is not accurate. What is mandatory is inspection and surface preparation. The amount of actual correction depends on what the inspection reveals.
What Does Paint Correction Mean?
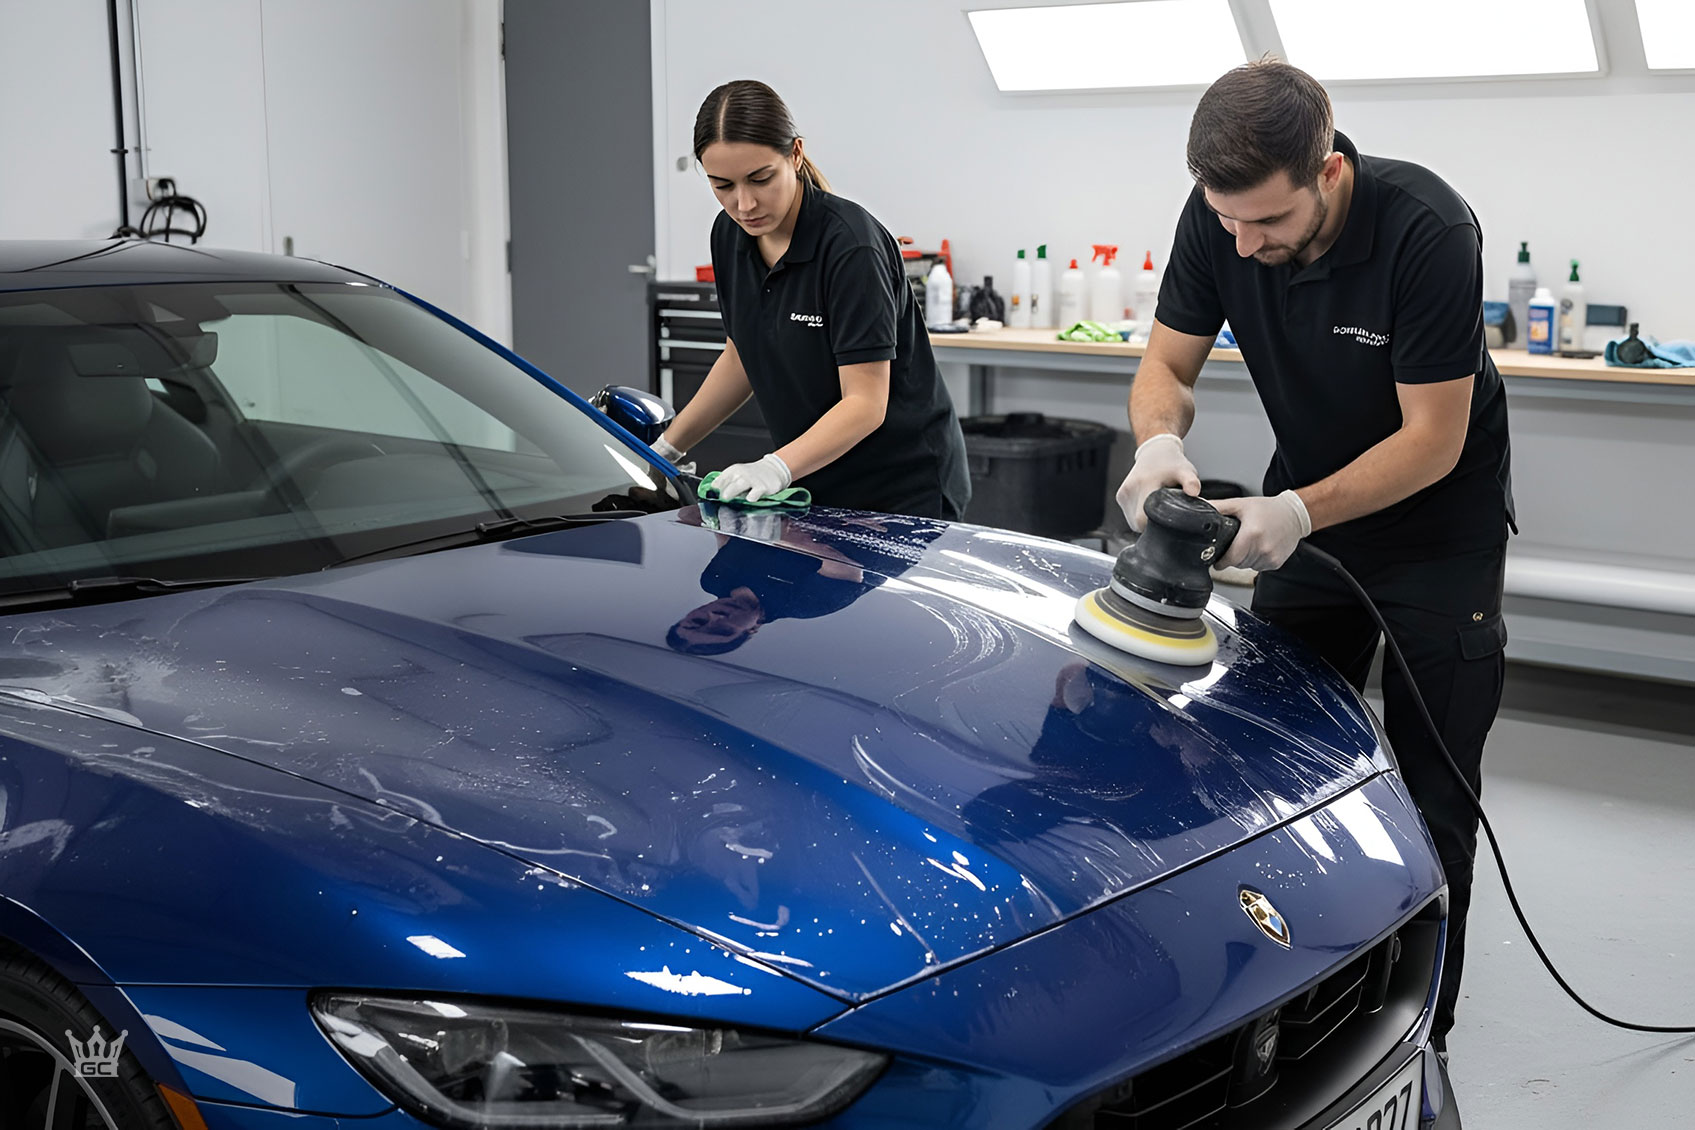
Paint correction is controlled machine polishing that removes or reduces defects in a vehicle’s clear coat. Those defects include swirl marks, fine scratches, oxidation, water spots, haze, holograms, buffer trails, and imperfections left by factory finishing or dealer prep. The process levels the clear coat so light reflects evenly, restoring clarity and gloss.
It ranges from a light single-stage enhancement polish to aggressive multi-stage compounding and polishing, depending on how bad the paint condition is. A one-step polish might take a few hours. A full multi-stage correction on a neglected dark vehicle could take a full day or more.
Paint correction is not wax, glaze, sealant, or coating. Those products sit on top of the surface. Correction physically refines the surface itself by removing microscopic amounts of clear coat to eliminate defects.
This distinction matters because paint protection film and vinyl wraps are applied directly to the clear coat. Whatever the clear coat looks like at the moment of installation is what gets preserved underneath.
Why Paint Correction Matters Before PPF
Clear PPF is optically transparent. The whole point is to see the original paint through the film. That means every defect in the paint, every swirl, every haze mark, every water spot etch, remains visible after the film is installed.
3M’s official Protection Wrap Film documentation states that defects including scratches, dents, bubbling, pitting, fisheyes, and orange peel may remain visible through the film, and the company specifically recommends professional paint correction when heavy orange peel is present before installing their protection wrap film. Source: 3M Protection Wrap Film Installation Guide
Once PPF is installed, you cannot polish the paint underneath without removing the film first and then reinstalling it. On a full-body PPF job, that means paying for removal, correction, and a completely new film installation. The cost of rework far exceeds the cost of correcting the paint properly the first time.
This is especially relevant for owners of luxury, performance, and high-value vehicles. A FerrariChat discussion about paint correction prior to PPF captures this well: one owner decided on full correction before film because defects would be permanently inaccessible after installation, and partial PPF coverage could create a visible inconsistency between corrected protected panels and uncorrected unprotected areas.
The role of paint correction before applying PPF comes down to four practical outcomes:
-
Visual clarity. Corrected paint looks sharper and deeper under clear film.
-
Defect prevention. Swirls, haze, and marks do not get locked in permanently.
-
Surface smoothness. Film lays flatter over refined paint, especially around edges and complex curves.
-
Reduced rework. Getting it right before installation avoids expensive strip-and-redo scenarios later.
If you are weighing PPF options for your vehicle, understanding paint condition before booking is one of the most important steps.
Why Paint Correction Matters Before a Vinyl Wrap
Vinyl wraps work differently from PPF. A colour-change wrap hides the original paint colour, so gloss clarity is less of a concern. But vinyl does not flatten texture, fill chips, or bridge over dents. The role of paint correction before applying a vinyl wrap shifts from optical refinement to surface smoothness.
3M’s Wrap Film Series 2080 FAQ states that all wrap films should be applied to a “like new” finish, and that rust, bubbling, scratches, dents, and other damage can remain visible through the film or cause premature failure. Source: 3M 2080 Wrap Film FAQ
Avery Dennison’s SW900 application instructions reinforce this, requiring that wax and polish residues be completely removed, that repainted surfaces be fully dry and hardened, and that a clean, dry application surface is necessary for bonding. Source: Avery Dennison SW900 Application Instructions
Practitioners on Reddit’s CarWraps community consistently warn that vinyl will cover some surface scratches visually, but anything with physical texture can telegraph through the film. The practical test, sometimes called the “rule of thumbnail,” is simple: lightly drag a fingernail over the defect. If it catches or you feel a texture change, expect it to show through the wrap. Users in the same threads also warn against wrapping over chipped paint without sealing it, because moisture can get underneath and create rust concerns.
If you are considering a full vehicle wrap, the paint does not need to be show-car perfect, but it does need to be smooth, clean, and structurally sound.
How the Role Changes by Film Type
The amount and type of correction depends on what film is being installed. Here is how it breaks down:
|
Film Type |
What Correction Does |
Full Correction Always Needed? |
What Still Needs Repair? |
|---|---|---|---|
|
Clear gloss PPF |
Maximises clarity, prevents trapping swirls, haze, water spots, and dullness under a transparent layer |
No. Inspect first. Light defects may be hidden by film, but visible defects should be corrected |
Chips, exposed primer or metal, dents, rust, failing clear coat |
|
Satin or matte PPF |
Creates a clean, even base so the satin finish looks uniform without telegraphing texture |
Not always. Focus on texture, chips, and visible marks |
Deep scratches, paint chips, panel damage, oxidation, bubbling |
|
Colour PPF or protection wrap film |
Reduces texture and visible defects that can show through high-gloss or colour film |
Not always. Heavy orange peel and surface texture matter most |
Rust, bubbling, body filler issues, uncured repaint, deep chips |
|
Vinyl colour-change wrap |
Helps film sit on smooth, clean paint and reduces visible scratches, texture, and edge problems |
Usually not a full concours correction. Decontamination plus spot correction is often more relevant |
Anything your fingernail catches, failing paint, exposed metal, dents, rough touch-up |
3M notes that high-gloss films can magnify paint defects such as orange peel, and their Protection Wrap Film FAQ recommends setting expectations with the customer before installation. Source: 3M Protection Wrap Film Vehicle Installation FAQ
For owners deciding between satin and gloss finishes, this table explains why paint condition affects both options differently. Our satin PPF vs gloss PPF decision guide covers that comparison in more detail.
Do New Cars Need Paint Correction Before PPF or Wrap?
Sometimes. The assumption that a brand-new car has perfect paint is one of the most common misconceptions in the PPF and wrap space.
New vehicles can arrive from the factory with orange peel, light sanding marks, or inconsistent finishes. After leaving the factory, they pick up additional defects during transport, port handling, protective film removal, dealer washing, and showroom prep. Swirl marks from improper washing, light scratches from transportation film removal, and hazing from poor dealer prep are all common on vehicles that are technically “brand new.”
That said, many new cars do not need a heavy multi-stage correction. Practitioners on Reddit’s AutoDetailing community are split on this topic but the most balanced take is consistent: some new cars are nearly perfect and others need at least a polish, so the answer depends on paint condition after inspection.
The right approach: inspect the car under bright, directional lighting before deciding. Many new vehicles only need decontamination, spot correction on a few panels, or a light enhancement polish. A few need more. And some genuinely need almost nothing.
If you have just picked up a new car and want to understand all your protection options, our guide to the best protection options for new car paint walks through the decision.
Is Paint Correction Always Required Before PPF or Wrap?
No. Every film installation needs surface preparation. Not every vehicle needs heavy correction.
This is the point where the article you are reading differs from most others on this topic. Many shop websites tell you paint correction is essential before PPF, full stop. That is a better sales pitch than it is accurate advice. Manufacturer guidance from 3M and Avery Dennison emphasises clean, sound, cured, residue-free surfaces. It identifies specific visible defects that should be corrected. It does not support a blanket requirement for aggressive multi-stage polishing on every car before every install.
Reddit detailing discussions reflect this real-world split. Several experienced installers and detailers say quality PPF can hide light marring or minor swirls and that polishing a new or well-maintained car before film can be unnecessary removal of clear coat. Others still prefer at least a light polish for appearance and edge cleanliness. The most honest answer from these discussions: it depends on paint condition.
Paint correction before applying PPF or wrap is strongly recommended when:
-
Visible swirl marks, haze, oxidation, holograms, water-spot etching, or dullness are present on panels that will remain visible under clear PPF.
-
The car is dark-coloured or high-gloss and defects are obvious under sunlight or inspection lighting.
-
The vehicle is being fitted with partial PPF (full-front only, for example), because uncorrected panels may look different beside protected panels.
-
Heavy orange peel exists and a high-gloss film is being installed.
-
The surface has roughness, overspray, rail dust, tar, sap, or bonded contamination that would stop the film from sitting flat.
-
The customer expects a premium finish on a luxury, performance, EV, or show vehicle.
Full paint correction may be unnecessary when:
-
The vehicle’s paint is already in excellent condition after thorough inspection.
-
The film is going over paint with only very light micro-marring that the chosen PPF will visually mask.
-
The owner prioritises preserving clear coat thickness over achieving a concours-level finish under the film.
-
The job is a vinyl colour-change wrap where the relevant concern is surface smoothness, not gloss clarity.
-
A spot polish or one-step enhancement will address the visible issues without unnecessary clear coat removal.
A good installer does not chase every defect before film. They preserve clear coat while preparing the surface properly.
What Level of Correction Is Usually Needed?
Prep Only, No Correction
For paint in excellent condition. The vehicle gets a safe wash, chemical decontamination, clay treatment if needed, and a panel wipe with isopropyl alcohol before film installation. This is common on very well-maintained vehicles and some new cars that arrive in good shape.
Spot Correction
For isolated problems: a bird dropping etch on one panel, sanding marks from a dealer touch-up, a few water spots, or scattered scratches. Only the affected areas are machine polished.
One-Step Enhancement Polish
For new or well-kept vehicles with light swirls, mild haze, or overall dullness. A single pass with a finishing polish and a medium pad refines the surface without aggressive clear coat removal. This is the most common correction level before PPF on newer cars.
Multi-Stage Correction
For older, dark, high-gloss, high-value, or neglected vehicles where heavy swirls, oxidation, holograms, deep water-spot etching, or sanding marks would remain visible under clear film. This involves compounding first to remove heavier defects, then finishing with a finer polish to refine the surface.
LinkedIn posts from premium detailing and PPF businesses often present multi-stage correction as part of high-end PPF work, particularly on supercars and luxury vehicles where old film is removed, the paint is fully corrected, and new full-body film is installed. That workflow makes sense for high-value restorations, but it is not what every vehicle needs.
What Defects Need Repair, Not Just Polishing?
Paint correction cannot fix everything. Understanding the limits is just as important as understanding the benefits.
Paint correction cannot:
-
Fill rock chips or missing paint
-
Remove dents
-
Repair rust
-
Rebuild peeling or flaking clear coat
-
Make failing or poorly bonded paint safe for film removal later
-
Fix uncured or poorly prepared repaint work
-
Eliminate deep scratches that go through the clear coat into the colour or primer
-
Replace bodywork, primer, or repainting where paint is missing
3M’s installation troubleshooting guidance warns that unsound substrates, including loose paint, abrasion, gouges, and damaged surfaces, should be repaired before film installation. New paint must fully cure according to the paint manufacturer’s instructions before film is applied. Source: 3M General Installation Techniques
Avery Dennison adds that solvent residues in painted substrates can adversely affect film adhesion and cause shrinkage or blistering, and that incompatible paint layers may lift when film is eventually removed.
Polishing makes good paint better. It does not turn damaged paint into healthy paint. If a defect catches your fingernail, polishing alone probably will not solve it. It may need touch-up, sanding, primer, curing, or body repair before film.
The Correct Pre-Install Sequence
Understanding where paint correction fits in the overall workflow helps explain its role. Here is the typical sequence a professional shop follows:
-
Vehicle inspection under bright, directional lighting to identify every defect.
-
Safe wash to remove loose dirt and grime.
-
Chemical decontamination for tar, iron fallout, tree sap, or other bonded contaminants.
-
Clay treatment if the surface is rough or contaminated. Both 3M and Avery Dennison mention clay bar use to remove contaminants from painted surfaces before film.
-
Defect assessment across all panels: swirls, holograms, water spots, oxidation, sanding marks, chips, orange peel, clear-coat failure, and repaint issues.
-
Paint correction (spot, one-step, or multi-stage) based on condition and film type.
-
Touch-up or body repair for chips, missing paint, rust, or failing clear coat.
-
Cure time for any new paint or primer, following the paint manufacturer’s instructions.
-
Residue removal and panel wipe to remove polish oils, wax, sealant, dust, and fingerprints. This step is critical. 3M warns that ceramic coating and ceramic boost spray should not be used for vehicle preparation before their protection wrap film. Avery says wax and polish residues must be completely removed.
-
Film installation in a clean, controlled environment.
-
Edge finishing and post-heating where required.
Correction without proper residue removal can actually harm the installation. If polishing oils or compounds remain on the surface, the film adheres to the residue instead of the paint, which can lead to poor adhesion and premature failure.
Every install needs prep. Not every install needs heavy correction. But every correction must be followed by thorough residue removal.
What Happens If You Skip Paint Correction?
Skipping correction when the paint actually needs it leads to several problems:
-
Locked-in defects. Swirls, scratches, and haze remain visible under clear PPF and cannot be polished out without stripping the film.
-
Visible texture through wrap. Chips, orange peel, and rough areas telegraph through vinyl, creating bumps and imperfections in the wrap finish.
-
Inconsistent appearance with partial PPF. If only the front end gets protected, the corrected and protected panels can look noticeably different from the uncorrected rear panels.
-
Potential adhesion issues. Contamination, rough texture, and loose paint can affect how well the film bonds, especially around edges and high-stress areas.
-
Expensive rework. Correcting paint after PPF has been installed means removing the film, correcting, and then paying for new film and a fresh installation.
3M’s FAQ documentation states that defects may remain visible and can damage film or cause premature failure. The practical message: correction is cheaper to do before installation than after.
Can PPF or Wrap Hide Scratches?
Sometimes, but do not rely on it.
High-quality PPF can hide some light swirls and micro-marring because of its thickness and adhesive properties. Several practitioners on Reddit’s AutoDetailing community report that good PPF masks minor swirls effectively on lighter-coloured cars.
But deeper scratches, chips, dents, water-spot etching, oxidation, heavy orange peel, and failing clear coat can still show through PPF. The film preserves, it does not conceal.
Vinyl wrap can hide colour differences but often reveals texture. The “rule of thumbnail” from the wrap community holds up well: if your fingernail catches on it, the wrap is likely to show it.
Neither PPF nor vinyl wrap is a substitute for paint correction when the paint genuinely needs it.
The Correct Order: Correction, PPF, Wrap, Ceramic Coating
A question that comes up frequently is where ceramic coating fits in. The correct order is:
-
Inspect, wash, and decontaminate.
-
Correct paint if needed.
-
Remove all polishing residues.
-
Install PPF or wrap.
-
Apply ceramic coating on top of the film (if desired and compatible with the film).
Ceramic coating should not be applied to the paint before PPF or wrap. 3M explicitly states that ceramic coating and ceramic boost spray should not be used as vehicle preparation for their protection wrap film.
If you are comparing these protection options, our breakdown of PPF vs ceramic coating explains when each option makes sense and how they work together.
Clear Coat Preservation: A Valid Concern
Some owners worry that paint correction thins the clear coat unnecessarily, especially before PPF that might hide minor defects anyway. That concern is valid in principle. Paint correction does remove microscopic amounts of clear coat, and unnecessary polishing is unnecessary clear coat removal.
The answer is balance. A professional does not chase every micro-defect before film. The goal is not to remove the maximum amount of clear coat. It is to create a clean, smooth, visually acceptable surface for the film while preserving as much clear coat thickness as possible.
On a new vehicle with light marring that PPF will mask, skipping correction and going straight to decontamination and panel wipe may be the right call. On a five-year-old dark vehicle with heavy swirls that will be locked under clear film for years, correction is clearly worthwhile. The decision is always conditional.
The Bottom Line
Paint correction before PPF or wrap is the step that decides what gets protected. Film preserves the condition underneath. If the paint is clean, smooth, and visually acceptable, the installer may only need decontamination and light prep. If the paint has visible defects, oxidation, scratches, chips, water spots, or texture, correction or repair should happen before the film goes on.
The strongest way to think about the role of paint correction before applying PPF or wrap is this: prep is always required, full correction is not. Inspect the paint, remove contamination, repair what polishing cannot fix, correct visible defects that will affect the final result, remove all residues, then install the right film.
If you want your vehicle’s paint assessed before committing to PPF or a wrap, get in touch with Gold Coast Wrap Kings to discuss what level of preparation your vehicle actually needs.
Frequently Asked Questions
Is paint correction the same as polishing?
Paint correction usually involves machine polishing, but the term is broader. It refers to the controlled removal or reduction of clear-coat defects including swirl marks, fine scratches, oxidation, haze, water spots, holograms, and buffer trails. A single polish pass might be all that is needed, or correction might require multiple stages with different compounds and pads.
Do I need paint correction before PPF on a brand-new car?
Not always, but the car should be inspected under proper lighting. New vehicles can have transport marks, dealer wash swirls, haze, or contamination from port handling and showroom prep. Many new cars only need spot correction or a light enhancement polish rather than a heavy multi-stage correction. Some need almost nothing beyond decontamination and a panel wipe.
Will PPF hide swirl marks?
High-quality PPF can mask some light swirls and micro-marring, particularly on lighter-coloured vehicles. But it should not be relied on to hide obvious damage, water-spot etching, chips, oxidation, sanding marks, dents, rust, or failing clear coat. Practitioners on Reddit report mixed results depending on defect severity and film thickness.
Will a vinyl wrap hide scratches or chips?
A vinyl wrap can hide colour inconsistency, but it often shows surface texture. If a scratch or chip catches your fingernail, expect it to telegraph through the wrap unless it is repaired or smoothed first. Wrapping over chipped paint without sealing it also raises moisture and rust concerns over time.
Can I wax or ceramic-coat the car before PPF or wrap?
No. Wax, sealants, polish residues, and ceramic products can interfere with film adhesion and must be removed before installation. 3M instructs installers not to use ceramic coating or ceramic boost spray as vehicle preparation for their protection wrap film. Ceramic coating can be applied on top of the film after installation if it is compatible with the specific film product.
Can paint correction fix rock chips before PPF?
No. Paint correction can reduce scratches and defects in the clear coat, but missing paint, exposed primer or metal, rust, dents, or bubbling clear coat all need touch-up or body repair before film is applied. Polishing cannot rebuild missing material.
Should paint correction be done before or after removing old PPF or wrap?
After removal. The true paint condition cannot be assessed until old film is off. Film removal can also leave adhesive residue or minor marring that may require polishing. The correct sequence is always: remove old film, assess paint, correct if needed, prep the surface, then install new film.
What is the difference between surface prep and paint correction?
Surface preparation includes washing, chemical decontamination, clay treatment, and residue removal. Every PPF and wrap installation requires surface preparation. Paint correction is the polishing step that removes clear-coat defects. It is part of preparation when needed, but it is not always needed. A car with clean, smooth, defect-free paint may only need prep without any correction at all.
FAQ
Australian DIY kits start from approximately $295 AUD for a single panel (like a full bonnet kit) from suppliers like Paintgard. A full front kit ranges from roughly $500 to $1,200 USD depending on the brand and film tier. Full-body kits run $1,500 to $2,200 USD. Compare that to $4,000 to $7,000 USD for a professional full-body install.
No. The Highland has completely redesigned front and rear bumpers, different headlight shapes, and no fog lamp cutouts. Every major kit seller lists separate products for the Highland (2024+) and the pre-Highland (2017 to 2023). Always verify your model year before ordering.
A hair dryer works as a substitute but is less effective. It produces lower, less focused heat, which makes it harder to conform the film around compound curves like the front bumper. For flat panels and door cups, a hair dryer is adequate. For bumpers and fenders, a proper heat gun makes a noticeable difference.
The front bumper, without question. Its compound curves require aggressive heat and stretching, and most pre-cut kits split it into multiple pieces that create visible seam lines. Practitioners on Reddit consistently recommend starting with easier panels (hood, door cups) to build confidence before attempting the bumper.
Budget two to four hours per panel for a first-time installer. A full front (bumper, hood, fenders, mirrors) can easily take an entire weekend. YouTube walkthroughs from Drive Protected and others show that even experienced DIYers work methodically through each section.
Pre-cut kits for first-timers, every time. The consensus across Tesla forums and Reddit is unambiguous on this point. Bulk rolls offer better edge coverage and lower per-metre cost, but they require cutting on the car, which risks scoring Tesla’s thin paint. That damage is permanent and requires repainting.
Yes. Once the PPF has fully cured (at least 48 hours, ideally a week), you can apply a ceramic coating directly on top. The PPF’s clearcoat layer is designed to accept ceramic coatings. The combination provides impact protection (PPF) plus chemical and UV resistance (ceramic), which is the most complete paint protection setup available.
It depends on your goals. DIY PPF on a Model 3 saves roughly 60 to 70 percent compared to professional installation and delivers perfectly acceptable results on flat panels, door cups, and headlights. For compound-curve panels like the front bumper, full-body matte finishes, or if you want a labour warranty, professional installation is the better choice. Many owners take a hybrid approach: DIY the easy panels and pay a pro for the bumper.