TL;DR
Preparing a car for a full vinyl wrap installation is mostly about surface cleanliness and paint condition. The process follows a strict sequence: hand wash with pH-neutral shampoo, clay bar decontamination, iron removal, and a full degrease with isopropyl alcohol. Any existing wax, ceramic coatings, or sealants must be stripped before film goes on. Skip the prep, and even the best vinyl will fail early.
Why Preparation Matters More Than the Wrap Itself
Here is a fact that surprises most car owners: the single biggest factor in how long a vinyl wrap lasts is not the film brand, the colour, or even the installer’s skill. It is the preparation of the surface underneath.
Poor surface prep is the number one cause of wrap failure, according to multiple industry sources. A properly prepared vehicle wrapped with quality cast vinyl can hold up for five to seven years. Cut corners on prep, and you might see lifting, bubbling, and adhesion failure within 12 to 18 months.
Practitioners in the DIY Wrap Club community put it bluntly: “The big skills are surface prep, controlling stretch, managing edges and corners, and post-heating.” Prep is not a preliminary chore. It is half the job.
This guide defines every term and concept you will encounter when learning how to prepare a car for a full vinyl wrap installation. Whether you have booked an appointment with a professional shop or plan to tackle the project yourself, understanding these terms will help you make better decisions, ask better questions, and get a better result.
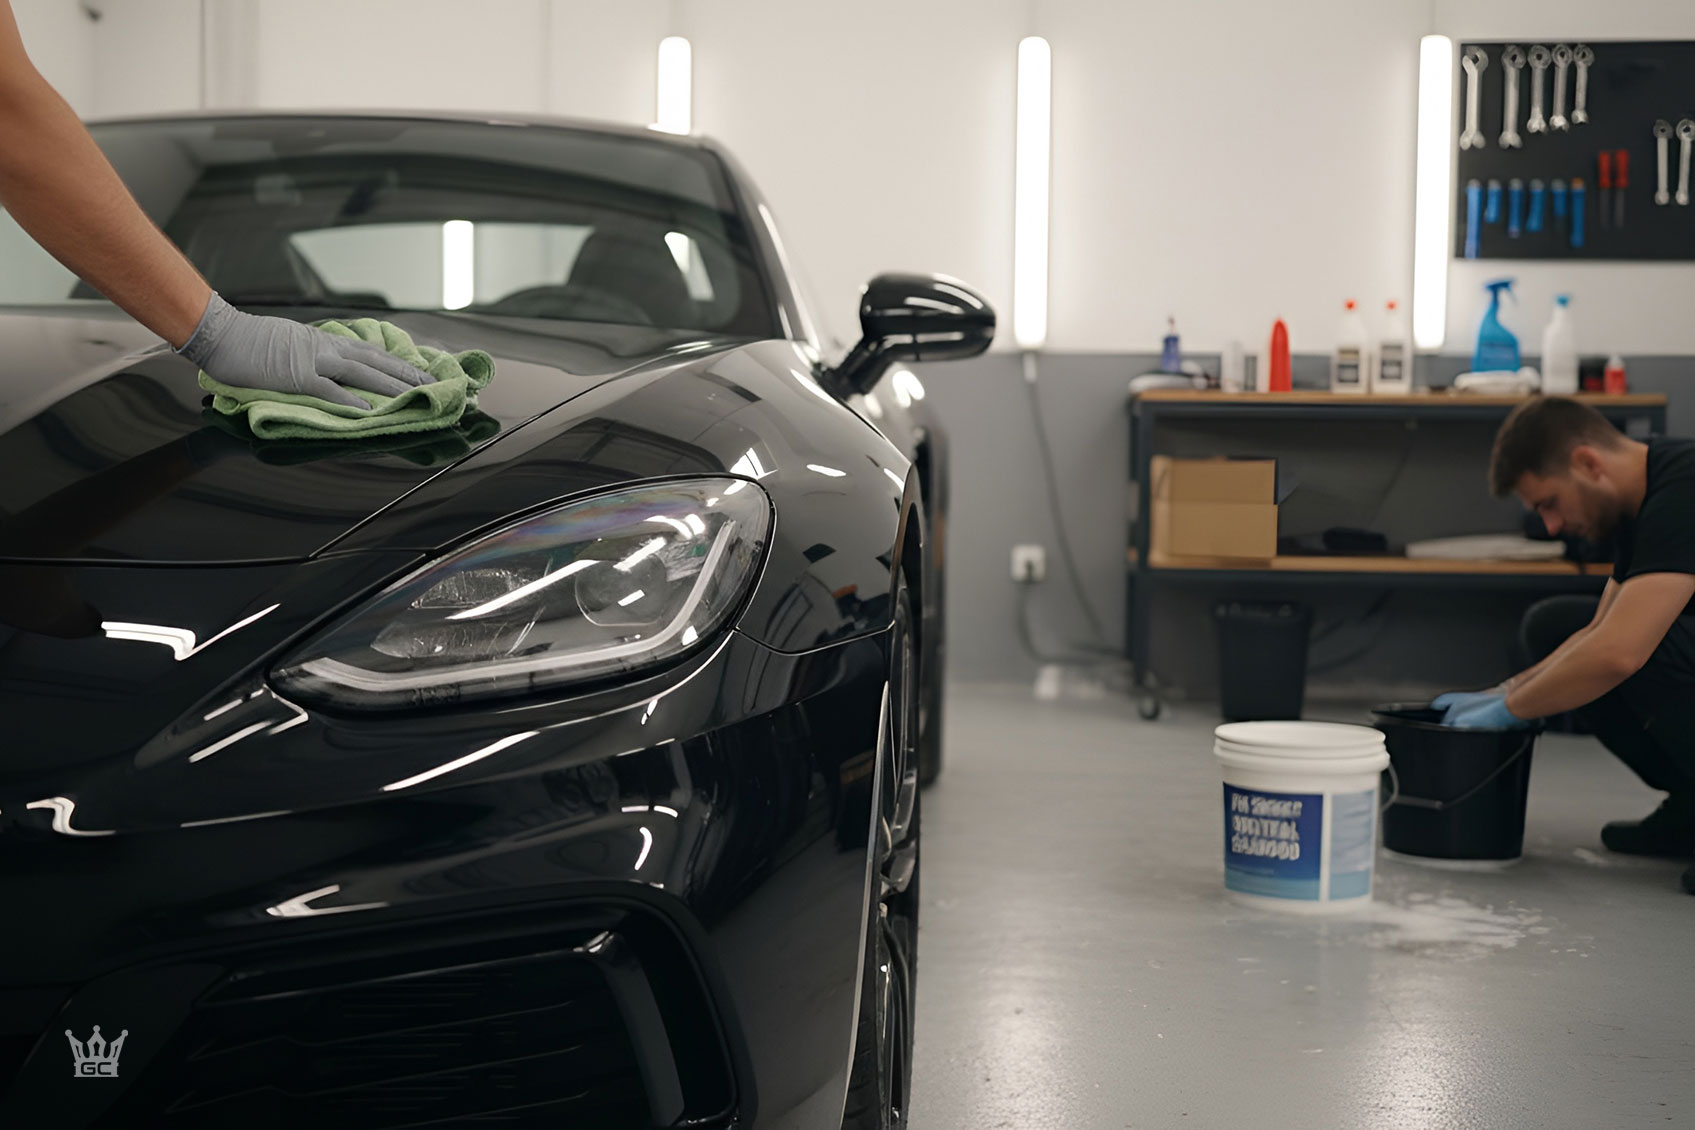
Surface Cleaning: The Foundation of Every Successful Wrap
A vinyl wrap bonds directly to your paint’s clear coat. Anything sitting between the adhesive and that clear coat (dirt, wax, tree sap, brake dust, fingerprints) weakens the bond. The cleaning protocol for wrap preparation is more thorough than a standard car wash, and it follows a specific order.
pH-Neutral Shampoo
A pH-neutral car wash shampoo cleans the surface without leaving behind waxy residue or stripping paint. This is the only type of soap you should use before a wrap. Regular car wash soaps, especially those marketed as “shine-enhancing” or “wax-infused,” deposit a thin film that repels vinyl adhesive.
Why it matters: Wax residue is invisible to the eye but measurable in adhesion tests. It creates a low-energy surface (more on that term below) that vinyl cannot grip properly.
Practical tip: Hand wash the vehicle the day before your wrap appointment using pH-neutral shampoo and warm water. Pay extra attention to panel edges, door jamb seams, and areas around badges where grime collects. Do not use an automatic car wash, as the brushes and sprays leave wax residue in every crevice. Once your wrap is installed, the cleaning approach changes, so read up on how to clean a vinyl wrap after installation to keep the film in top condition.
Clay Bar Decontamination
A clay bar is a malleable detailing tool that lifts bonded contaminants from paint that washing cannot remove. Tree sap, industrial fallout, brake dust, and road tar embed themselves into the clear coat over time. Run your hand across a freshly washed panel: if it feels rough or gritty, those contaminants are still there.
Why it matters: Any particle trapped under vinyl creates a visible bump. On solid-colour wraps, these imperfections are especially obvious. Practitioners on the Signs101 professional forum note that clay-barring is essential for “big solid colour” applications where any speck shows through. Some shops charge extra for this step, while others include it as standard.
Practical tip: Use an automotive clay bar kit with a dedicated lubricant spray. Work in small sections, keeping the surface wet. Fold the clay frequently to expose a clean face.
Iron Decontamination
Iron particles from brake dust and rail dust embed themselves in paint at a microscopic level. They are invisible to the naked eye but create tiny raised points that telegraph through vinyl film. An iron remover (a chemical spray that reacts with ferrous particles, typically turning purple on contact) dissolves them without scrubbing.
Why it matters: The DIY Wrap Club community highlights iron removal as a pre-wash step that most beginners miss. It is one of the simplest upgrades to your preparation process and one of the most impactful.
Practical tip: Spray the iron remover onto dry panels before clay-barring. Let it dwell for 2 to 3 minutes, then rinse thoroughly. You will see purple or red bleeding where iron particles dissolve.
IPA (Isopropyl Alcohol) Degreasing
IPA is the go-to solvent for stripping oils, wax, fingerprints, and residual contaminants from paint before wrapping. A 70% IPA solution is the most commonly recommended concentration for this purpose. You apply it with a clean microfibre cloth and wipe every panel that will be wrapped, including edges and recesses.
Why it matters: Even after washing and clay-barring, invisible oils from your hands, polishes, or previous detailing products remain. IPA removes them without leaving its own residue.
Practical tip: Some installers prefer a dedicated solvent-based grease and wax remover for heavily contaminated vehicles, particularly those with built-up sealant layers. For most cars, 70% IPA is sufficient and easy to source from any chemist.
Surface Energy
Surface energy describes how receptive a paint surface is to adhesion. Think of it as the paint’s “grip factor.” Clean, degreased paint has high surface energy, meaning vinyl adhesive can bond strongly. A waxed, polished, or ceramic-coated surface has low surface energy, meaning adhesive slides and fails to stick.
Why it matters: Every cleaning step above exists to raise the surface energy of your paint. Skipping any step lowers it. The result is a wrap that might look fine on day one but begins lifting at edges within weeks.
Paint Condition and Repair: What the Vinyl Cannot Fix
Vinyl wraps do not hide damage. They highlight it. The film conforms tightly to whatever surface it covers, so every chip, scratch, dent, and rust spot shows through. Understanding your paint’s condition before wrapping saves money and prevents disappointment.
Clear Coat Failure
The clear coat is the transparent protective layer over your car’s base colour. When it fails (peeling, flaking, clouding, or oxidising into a chalky white), vinyl adhesive has nothing stable to bond to. Wrapping over failing clear coat is a guaranteed path to early failure, and when the wrap is eventually removed, it may pull damaged paint off with it.
Practical tip: Run your hand over suspect areas. If you feel rough edges or see flaking, that section needs paint repair before wrapping. If you discover significant paint issues, you might consider paint protection film as an alternative for those panels.
Outgassing
Outgassing is the release of solvents trapped in fresh paint as it cures. If vinyl is applied over uncured paint, these gases get trapped under the film and form bubbles. Professional installers on the Signs101 forum recommend waiting 30 to 90 days after a respray before applying any vinyl, with the exact timing depending on the paint manufacturer’s cure schedule.
Practical tip: If you have recently had bodywork or a partial respray, tell your wrap shop. They will advise on timing. Rushing this step causes visible bubbles that require the wrap to be redone.
Paintless Dent Repair (PDR)
PDR is a technique that removes minor dents without repainting. Technicians use specialised tools to massage the metal back into shape from behind the panel. Since vinyl telegraphs the shape of anything underneath it, dents remain visible through a wrap.
Practical tip: You can wrap over small dents. The vinyl will not be damaged by them. But if appearance matters (and it usually does on a colour-change wrap), get PDR done before the wrap appointment. It is significantly cheaper than traditional body repair and preserves the factory paint.
Rust Spots
Rust is active corrosion. Wrapping over it does not stop the process; it hides it while it worsens. Vinyl may also fail to adhere to rusted surfaces. Any rust must be treated, sanded, primed, and repainted before wrapping. If your vehicle has surface damage from off-road use, our bush wraps and off-road protection guide covers what to address first.
Vinyl Film Types: Understanding What Goes on Your Car
Not all vinyl is the same. The type of film your installer uses directly affects how well it conforms to your car’s body, how long it lasts, and how it looks. Knowing the basics helps you understand pricing differences and ask informed questions.
Cast Vinyl
Cast vinyl is the premium standard for full vehicle wraps. It is manufactured by casting liquid PVC into a thin sheet, typically 2 to 4 mils thick (about 51 to 100 microns). The casting process produces a film that is thin, flexible, and dimensionally stable, meaning it resists shrinkage over time.
Why it matters: Cast vinyl conforms to complex curves, bumpers, mirrors, and recesses without excessive stretching. It is what reputable shops use for full wraps, and it is a major reason professional wraps last years longer than budget alternatives.
Calendered Vinyl
Calendered vinyl is a less expensive film made by pressing PVC through heavy rollers. The rolling process makes it thicker, stiffer, and more prone to shrinkage. It works fine on flat or gently curved surfaces (fleet graphics on a van side, for example) but struggles on compound curves.
Why it matters: If someone quotes you a suspiciously low price for a full wrap, ask what film they are using. Calendered vinyl on a full body wrap leads to shrinkage, edge lifting, and a shorter lifespan. For ideas on what quality cast vinyl wraps look like in practice, explore wrap colours and finishes here.
Conformability
Conformability measures how well a vinyl film stretches and moulds to three-dimensional surfaces. Bumper corners, side mirror housings, door handle recesses, and roof antenna bases all require high conformability. Cast films have excellent conformability. Calendered films do not.
Air-Release Channels
Modern wrap films have microscopic channels built into the adhesive layer. These channels allow trapped air to escape as the installer squeegees the film onto the surface. Without them, every trapped air pocket becomes a bubble that requires puncturing with a pin, which weakens the film.
Tack
Tack refers to the initial stickiness of vinyl adhesive on contact with the paint. Quality wrap films are designed with low initial tack, which allows the installer to reposition the film before committing. Once pressure is applied with a squeegee, the bond strengthens. This repositionability is critical for achieving wrinkle-free results on large panels like bonnets and roofs.
Vinyl Memory
Vinyl wants to return to its original flat shape after being stretched. This tendency is called memory. If memory is not “broken” through controlled heating after installation, stretched areas (especially around bumpers and mirrors) will slowly contract and pull away from edges. Post-heating is the step that defeats vinyl memory. More on that below.
Application and Installation Terms: What Your Installer Does and Why
Understanding the tools and techniques involved in wrap installation helps you appreciate why professional work costs what it does, and why preparation directly affects every step that follows.
Squeegee
A squeegee is the flat handheld tool used to press vinyl onto the car’s surface and push trapped air toward the edges. Squeegees come in different hardness levels. Felt-edged versions prevent scratching on delicate finishes like matte and satin wraps. One practical technique from the Australian Car Wrap Supplier community: wrapping a lint-free towel over a squeegee to clean hard-to-reach edges before film application, catching dust that a cloth alone would miss.
Knifeless Tape
Knifeless tape is a filament-based tape placed under the vinyl before application. When pulled, the filament cuts the vinyl cleanly along a precise line without a blade ever touching your paint. This is essential for paint-safe trimming, especially along panel edges, window lines, and trim pieces.
Adhesion Promoter (Primer)
An adhesion promoter (3M Primer 94 is the industry standard) is a chemical applied to stress areas like tight curves, deep recesses, and panel edges to strengthen the vinyl’s bond. It bridges the gap between the adhesive and surfaces where normal adhesion alone might not hold.
The catch: Practitioners at Metro Restyling warn that adhesion promoter misuse is a top-10 mistake among car wrappers. Too little promoter causes lifting on curves. Too much can damage paint when the wrap is eventually removed. The correct approach is to use it sparingly and only at documented stress zones.
Edge Sealer
Edge sealer is a liquid adhesive applied to wrap edges after installation to prevent lifting. It is used along trim lines, panel edges, and anywhere the vinyl terminates on a flat surface rather than tucking behind a panel. Think of it as insurance for the most vulnerable points of the wrap.
Post-Heat (Memory Breaking)
Post-heating is the final step of professional installation. The installer uses a heat gun to raise the vinyl temperature in stretched areas to 90 to 100°C (194 to 212°F), which permanently resets the film’s molecular structure. This “breaks” the vinyl’s memory, meaning it will no longer try to shrink back to its flat shape.
Why it matters: Post-heating is the step that many DIY wrappers skip, and it is the reason so many amateur wraps develop edge lifting within months. A professional shop post-heats every stretched area as standard practice. To see what professional results look like across different vehicle types, browse our recent wrap projects.
Environment and Conditions: Temperature, Humidity, and Your Gold Coast Climate
Vinyl film is temperature-sensitive at every stage of installation. Too cold and it becomes rigid. Too hot and the adhesive activates prematurely, eliminating the repositioning window that installers rely on.
The Three Critical Temperature Stages
Professional vinyl installation involves three distinct temperature ranges:
-
Ambient workspace temperature: 20 to 25°C (68 to 77°F). This is the ideal range for the installation environment. The vinyl is pliable enough to work with, and the adhesive activates at a predictable, manageable rate.
-
Stretching temperature: 40 to 60°C (104 to 140°F). This is the heat-gun range used during installation to soften vinyl around complex curves like bumpers, mirrors, and door handles.
-
Memory-breaking temperature: 90 to 100°C (194 to 212°F). The final heating pass that permanently resets stretched vinyl, as described above.
Why Gold Coast Climate Matters
Summer temperatures on the Gold Coast regularly exceed 30°C with high humidity. This creates two challenges for vinyl wrap installation. First, the ambient temperature pushes past the ideal working range, causing adhesive to activate too quickly. Vinyl installed above 27°C becomes difficult to reposition, leading to wrinkles that require rework.
Second, humidity drives moisture into panel gaps and seams. Multiple professional sources warn against using pressure washers the day before an appointment, because high-pressure water forces moisture into panel gaps that takes hours to dry, especially in humid subtropical climates. This trapped moisture can cause adhesion failure and bubbling.
Professional shops install in climate-controlled bays where temperature and humidity are managed regardless of what is happening outside. This is not a luxury. It is a requirement for consistent results.
Your Pre-Appointment Checklist: What to Do (and What to Avoid)
If you have booked a professional wrap, here is exactly how to prepare a car for a full vinyl wrap installation. Most shops handle hardware removal and final surface prep themselves, but arriving with a clean, properly prepared vehicle speeds up the process and can reduce your total cost.
Do This Before Your Appointment
-
Hand wash the vehicle the day before using pH-neutral, non-wax shampoo and warm water
-
Clean edges, seams, and door jambs where grime hides
-
Dry the vehicle thoroughly, including panel gaps and around badges
-
Remove personal belongings from the interior (installers will open doors frequently)
-
Remove aftermarket accessories you can easily handle: bike racks, roof racks, phone mounts, aftermarket badges
-
Disclose any recent bodywork, resprays, or ceramic coating applications
-
Mention any known dents, chips, or rust so the shop can plan accordingly
-
Arrange alternative transport for 2 to 5 days (a full wrap typically takes 2 to 5 days depending on vehicle size and complexity)
Do Not Do This Before Your Appointment
-
Do not apply wax, polish, or ceramic coating. These destroy adhesion.
-
Do not use an automatic car wash. They leave wax residue everywhere.
-
Do not apply tyre dressing. Overspray drifts onto lower panels and rocker panels.
-
Do not use a pressure washer the day before. It forces water into panel gaps.
-
Do not apply any “quick detail” sprays. Most contain silicone or wax.
-
Do not leave the car sitting for days after washing. Dust re-accumulates quickly.
-
Do not assume the wrap will hide existing damage. It will make it more visible.
After your wrap is complete, the care routine shifts. Understanding how to maintain your car wrap from day one protects your investment for years.
Special Considerations
Electric Vehicles
EVs like Teslas and BYDs present unique preparation challenges. Sensors, cameras, radar housings, and autopilot components must be carefully masked or worked around. Panel materials on some EVs differ from traditional steel body panels, affecting how adhesive interacts with the surface. An installer experienced with EVs will know which areas require special attention and which sensors must remain unobstructed. If you own a Tesla, our team has documented experience with Tesla wraps, including sensor and camera-safe installations.
Existing Ceramic Coatings
Ceramic coatings have become extremely popular for paint protection, and they create a specific problem for wrapping. The whole point of a ceramic coating is to create a slick, hydrophobic surface that repels water and contaminants. That same surface repels vinyl adhesive. Any existing ceramic coating must be chemically stripped or mechanically polished off before a wrap can be applied. This adds time and cost to the project, so inform your shop if your vehicle has been ceramic coated. For more on how these protection options compare, read our guide on ceramic coating versus PPF.
Existing PPF or Old Wraps
Old paint protection film or a previous vinyl wrap must be fully removed before a new wrap goes on. You cannot layer new vinyl over old vinyl and expect it to last. Adhesive residue from the old film also needs to be cleaned with a dedicated adhesive remover. Factor in the removal time when planning your timeline.
Fresh Paint
As noted in the outgassing section, freshly painted panels need 30 to 90 days to fully cure before vinyl application. Booking a wrap too soon after bodywork is one of the most common and most expensive mistakes car owners make. The paint looks dry and feels hard, but solvents continue escaping for weeks.
Cost Context
In Australia, a full vinyl wrap typically costs between $2,000 and $6,000 depending on vehicle size, film quality, and finish complexity. Small sedans sit at the lower end, large SUVs with premium finishes like chrome or colour-shifting films reach $7,000 or more. Proper preparation does not significantly add to this cost, but it dramatically extends the life of the wrap, making it far better value per year.
Ready to Get Your Car Wrapped?
Knowing how to prepare a car for a full vinyl wrap installation puts you ahead of most customers who walk into a shop. You understand why every cleaning step exists, what your paint condition means for the final result, and what to expect from the process.
If you are on the Gold Coast and considering a full wrap, colour change, or custom graphics, get in touch with Gold Coast Wrap Kings to discuss your project. The shop is located at Unit 1/29 Lawrence Drive, Nerang, and handles everything from surface preparation through to final post-heating in a controlled indoor environment.
Frequently Asked Questions
Wash your car the day before your appointment using pH-neutral shampoo and warm water. Washing too early means dust re-accumulates. Washing the morning of the appointment risks leaving moisture trapped in panel gaps and seams.
You can, but the vinyl will show them. Wraps conform tightly to the surface, so dents appear as shallow depressions and scratches as fine lines under the film. Paintless dent repair and scratch polishing before wrapping give the cleanest result.
Yes. Ceramic coatings create a low-energy, hydrophobic surface that vinyl adhesive cannot bond to reliably. The coating must be chemically stripped or polished off before installation.
A full vehicle wrap typically takes 2 to 5 days depending on the vehicle’s size, the complexity of its body lines, and whether hardware removal or paint correction is needed. Plan for your car to be unavailable for at least a few business days.
Wait at least 30 to 90 days for the paint to fully cure. Fresh paint releases trapped solvents (a process called outgassing) that cause bubbles and adhesion failure under vinyl. Ask your painter for the specific cure schedule of the product they used.
Professional shops handle hardware removal as part of their standard process. They have the tools and experience to remove and reinstall components without damage. You should remove personal accessories like bike racks, roof boxes, and phone mounts, and clear personal items from inside the vehicle.
Absolutely. The ideal installation temperature is 20 to 25°C in a controlled indoor environment. High heat causes adhesive to activate too fast, high humidity can trap moisture under the film, and cold temperatures make vinyl rigid and difficult to conform. This is why professional shops work in climate-controlled bays regardless of outdoor conditions.
A quality cast vinyl wrap on properly prepared paint, installed by a professional and maintained correctly, can last 5 to 7 years. Poor preparation or low-quality film can cut that lifespan to 1 to 2 years. The preparation steps outlined in this guide are the single biggest factor in wrap longevity.