
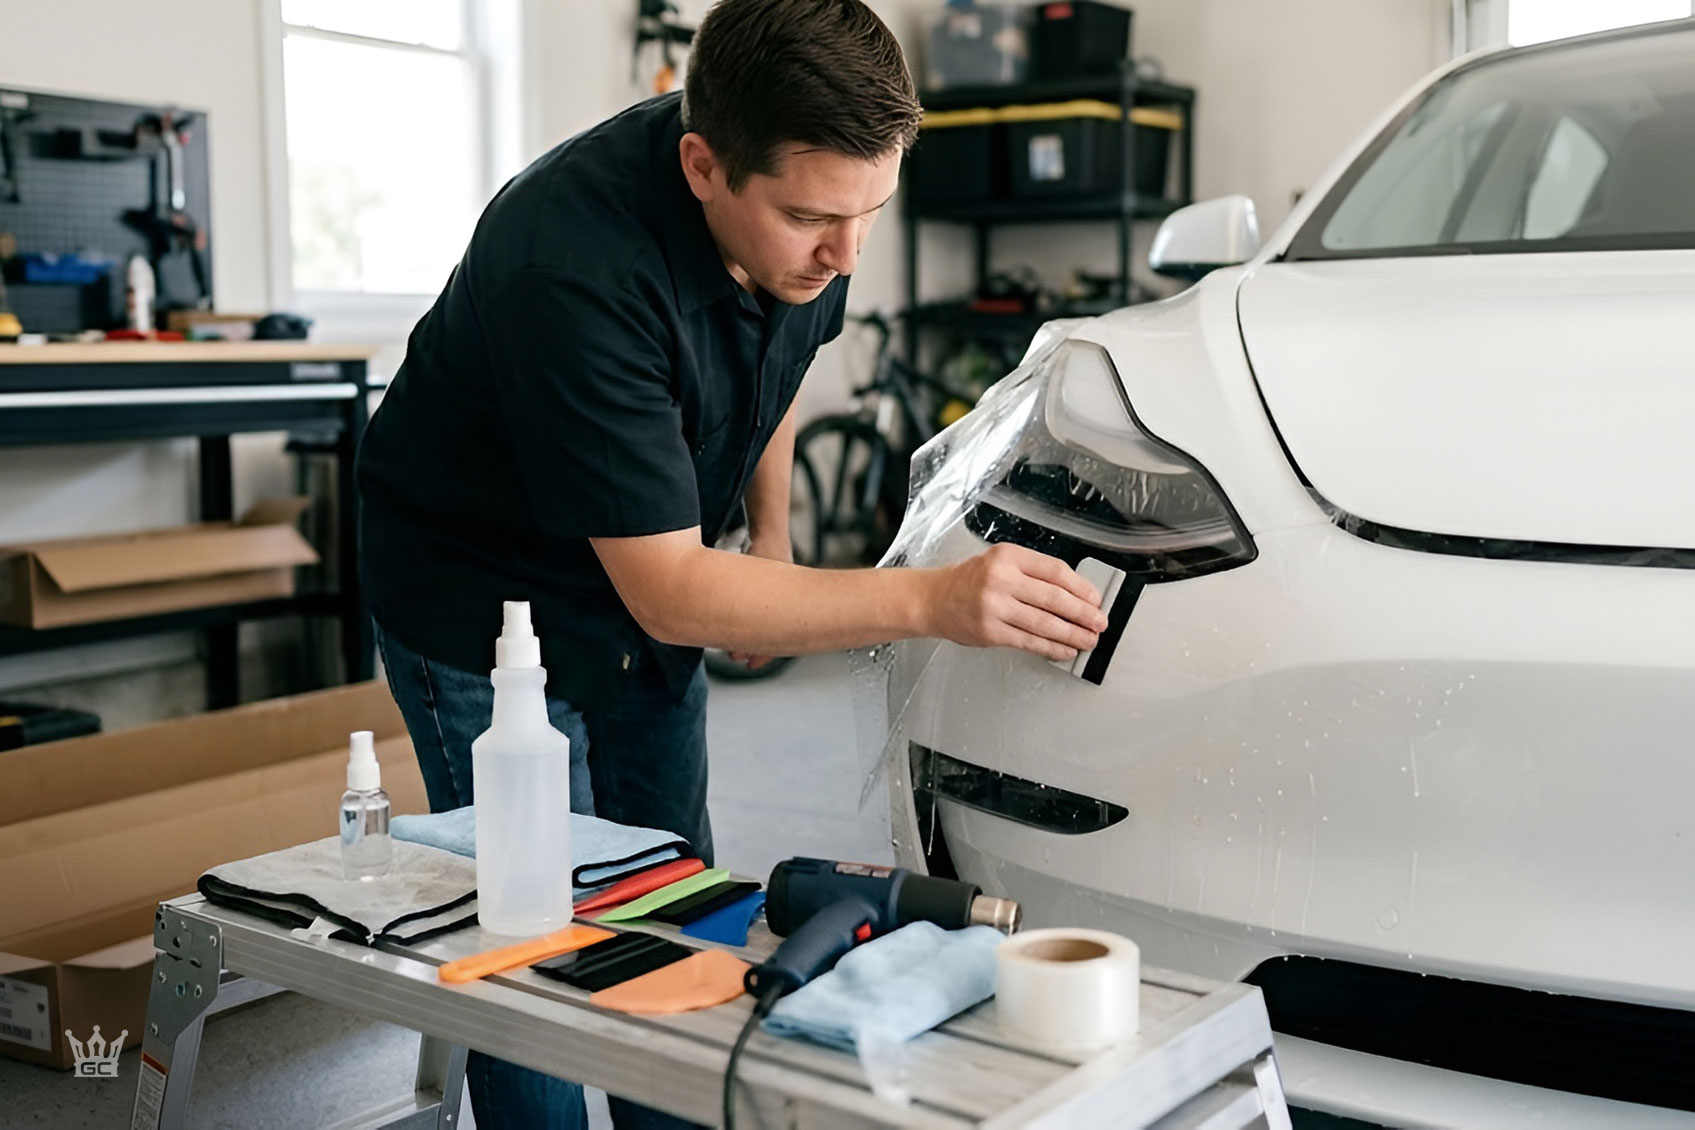
TL;DR
Tesla Model 3 paint is notoriously thin (80 to 100 microns versus 120 to 150 on German cars), making paint protection film a near-necessity rather than a luxury. A Model 3 PPF DIY kit costs roughly a third of a professional install, with full front kits running $500 to $1,200 compared to $1,400 to $2,500 at a shop. Pre-cut kits are the clear winner for first-timers since they eliminate the risk of slicing into Tesla’s fragile paint with a trimming knife. This glossary defines every term you will encounter when buying and installing a DIY PPF kit on your Model 3, from slip solution to Highland-specific fitment.
Why Model 3 Owners Need This Glossary
Buying a DIY PPF kit for your Model 3 means wading through terminology that ranges from obvious to baffling. Self-healing elastomeric polymers. Tack solution versus slip solution. Highland versus pre-Highland fitment. The YouTube tutorials move fast, the Reddit threads assume you already know the basics, and the kit product pages throw around acronyms without explanation.
This glossary exists to fix that. Every term is defined in plain language, then tied to what it actually means for your Model 3 install. Whether you are ordering your first pre-cut kit or debating whether to attempt the front bumper yourself, start here.
A quick note on why Model 3 owners pursue PPF more aggressively than most car owners: Tesla paint measures approximately 80 to 100 microns thick, compared to 120 to 150 microns on BMW and Mercedes vehicles. That thinness, combined with the Model 3’s low ride height and wide, flat hood, means rock chips can appear within the first few thousand kilometres. One detailing shop documented 25+ factory defects on the front end of a brand-new 2025 Model 3, including dirt nibs, sanding marks, and areas where paint was already flaking. Protection is not optional on these cars. It is maintenance.
For a deeper primer on what PPF is and how coverage levels work, the paint protection film guide, coverage, and care overview is a solid starting point.
PPF Fundamentals: Core Film Terms
PPF (Paint Protection Film)
A thick, optically clear urethane film applied over painted body panels to absorb stone chips, scratches, bug acids, and UV damage. Modern PPF from brands like XPEL, SunTek, 3M, and STEK is designed to be virtually invisible when installed correctly and to last 8 to 10+ years. For Model 3 owners, PPF is the single most effective defense against the car’s thin factory paint.
Clear Bra
The older, colloquial name for PPF. It dates from the early days of automotive paint protection when thick, slightly yellowing films were applied mostly to front bumpers. The product has evolved dramatically, but the name persists in casual conversation and older forum threads. If someone on a Tesla forum says “clear bra,” they mean PPF.
TPU (Thermoplastic Polyurethane)
The base material of modern PPF. Unlike rigid plastics, TPU is flexible, transparent, and can be stretched and heat-formed around compound curves. It can also be coloured or custom-textured to enhance gloss or matte finishes. When you see “urethane film” in a kit listing, it refers to TPU.
Self-Healing PPF
The headline feature of premium films. Self-healing PPF contains elastomeric polymers, which are cross-linked polymer chains that sit loosely enough to return to their original shape after minor deformation. When you apply heat (sunlight, warm water, a heat gun), light scratches and swirl marks disappear on their own. On a Model 3 in Southeast Queensland, afternoon sun does most of the healing work for you.
Hydrophobic Top Coat
A water-repelling surface layer baked into the top of premium PPF. Water beads up and sheets off rather than sitting on the surface, which makes the film easier to wash and reduces water spotting. Not all films include this layer. Budget films often skip it.
PPF Layer Structure
Understanding what you are actually applying helps you install it correctly. A typical PPF cross-section looks like this, from bottom to top:
-
Release liner (approximately 3.0 mils / 0.076 mm): The backing you peel off during installation. It protects the adhesive layer until you are ready.
-
Acrylic adhesive (approximately 1.6 mils / 0.040 mm): The layer that bonds to your paint. It is pressure-sensitive and activated by squeegeeing out the slip solution.
-
Polyurethane body (approximately 6.0 mils / 0.152 mm): The main protective layer. This is what absorbs impacts.
-
Clearcoat (approximately 0.5 mils / 0.013 mm): The surface layer that provides gloss, self-healing properties, and the hydrophobic top coat. It also helps ceramic coatings bond if you add one later.
Source: Ceramic Pro PPF technical overview
Gloss PPF (Ultra-Clear)
Standard transparent PPF that maintains your original paint’s gloss finish. This is what most Model 3 DIY kits include unless specified otherwise. When installed well, it is nearly invisible.
Matte / Satin / Stealth PPF
PPF with a matte or satin finish that transforms a glossy paint job into a stealth look. This costs more than gloss PPF and demands full-body application for a consistent appearance. You cannot put matte PPF on just the hood and leave the rest glossy; the mismatch looks terrible. For those considering this route on a Tesla, the satin PPF versus gloss PPF decision guide for Tesla Model Y covers the trade-offs in detail (the same logic applies to Model 3).
Coloured PPF
Tinted or pigmented PPF that combines paint protection with a colour change. It is the most expensive PPF tier and the hardest to install because colour inconsistencies at seams become more visible. This is generally not a realistic Model 3 PPF DIY project, even for experienced installers.
Coverage Tiers: What Gets Protected
Full Front
The most popular coverage tier for both professional and DIY installs. It covers the highest-impact forward-facing panels: front bumper, full hood, front fenders, and side mirrors. On a Model 3, this is where 80%+ of rock chip damage occurs.
Partial Front
A budget compromise. Typically covers the front bumper, the first 12 to 24 inches of the hood, and sometimes the mirrors. You save money, but the unprotected portion of the hood will eventually show a visible line where protected paint meets unprotected paint.
Full Body
Every painted surface gets covered. This is the only option worth considering if you want matte or satin PPF, since partial matte coverage looks inconsistent. A full-body Model 3 PPF DIY kit runs roughly $1,500 to $2,200 USD, compared to $4,000 to $7,000 for professional installation.
High-Impact Zones Often Overlooked
Several Model 3 panels catch damage that owners only notice after it accumulates:
-
Rocker panels: The lower body panels along the sills between the front and rear wheels. Road spray throws small debris directly at these surfaces, especially on wet roads.
-
A-pillars: The structural pillars flanking the windscreen. They catch debris flung upward from the tyres of vehicles ahead.
-
Door cups and door edge guards: Small PPF pieces that protect the finger recess behind door handles and the leading edge of each door. These are among the easiest Model 3 PPF DIY projects and a good starting point for complete beginners.
Model 3-Specific Terms
Highland (Refreshed Model 3, 2024+)
Tesla’s mid-cycle refresh of the Model 3, introduced in late 2023 for Australia and early 2024 in other markets. The Highland features redesigned front and rear bumpers, a new front fascia without fog lamp cutouts, and restyled headlights and taillights.
This matters because pre-cut PPF kits for the Highland do not fit the pre-2024 Model 3, and vice versa. Every major kit seller (DIY Wrap Club, Drive Protected, Paintgard, Abstract Ocean) lists separate SKUs for each body style. If you order the wrong generation, you will receive pieces that simply do not align with your panels. Always confirm your model year before purchasing.
Pre-Highland (2017 to 2023 Model 3)
The original Model 3 body style produced from 2017 through 2023. Kit sellers typically label these as “Model 3 2017-2023” or simply “Model 3 (Pre-Facelift).” The bumper shape, hood dimensions, and sensor placement differ significantly from the Highland.
Frunk Edge
The front trunk opening lip. On the Model 3, the leading edge of the frunk hood is one of the first spots to collect stone chips because it sits directly in the path of road debris. Most full-front kits include a frunk edge piece. If yours does not, it is worth adding.
Autopilot Cameras and Sensors
The Model 3 has cameras embedded in the B-pillars, front bumper area, and above the rear number plate. Pre-Highland models also include ultrasonic sensors in the bumpers. PPF must not obstruct these. Pre-cut kits account for sensor locations with cutouts already in the template. Bulk roll installs require careful trimming around each sensor, which is exactly the kind of precision work that risks paint damage.
For more on how professional shops handle sensor-safe PPF on Teslas, see the Gold Coast Tesla wraps and sensor-safe installation overview.
DIY Installation Terms
This section covers the tools and materials you will use during a Model 3 PPF DIY install.
Pre-Cut Kit vs Bulk Roll
This is the single most important decision you will make. Here is a direct comparison:
|
Factor |
Pre-Cut Kit |
Bulk Roll |
|---|---|---|
|
Skill level required |
Beginner-friendly |
Advanced |
|
Install time |
Faster (panels already shaped) |
Slower (must measure and cut each piece) |
|
Risk of paint damage |
Low, no trimming on the car |
High, requires knife cuts directly on paint |
|
Edge coverage |
Slightly inset from edges (1 to 2 mm gap typical) |
Can wrap fully around edges |
|
Cost |
Higher per kit |
Lower per metre but more waste |
|
Customisation |
Limited to the template design |
Fully customisable |
Source: Dr Solar pre-cut vs bulk comparison
The overwhelming consensus on Tesla forums and Reddit is that first-time DIYers should use pre-cut kits. The risk of knife damage to Tesla’s thin paint is the number one concern cited by practitioners. One commenter on r/TeslaModel3 put it bluntly: if you score the paint with a blade, that scratch cannot be fully repaired without repainting the panel, and the repainted area can never be perfectly wrapped again.
Slip Solution
A water-and-soap mixture sprayed on both the film’s adhesive side and the panel surface during installation. The slip solution creates a thin barrier that prevents the adhesive from grabbing immediately, giving you time to reposition the film before it sets. Most DIY kits include a concentrate you dilute with water.
Tack Solution
A solution with less soap (or an alcohol-based mixture) that helps the adhesive grip the paint once you have finalised positioning. You spray it at edges and areas where the film needs to wrap around a curve. Think of slip solution as giving you freedom to slide the film around, and tack solution as telling the film “stay here.”
Squeegee
A firm, flat tool used to push slip solution and air bubbles from under the film. Proper squeegee technique is the difference between a clean install and a bubble-filled mess. You work from the centre outward, applying firm, overlapping strokes. Most kits include one, but experienced DIYers prefer felt-edged squeegees that reduce the risk of scratching the film surface.
Heat Gun
Used to soften the PPF so it conforms around curves, bumper contours, and panel edges. The Model 3’s front bumper has compound curves that will not accept cold film without wrinkles. A hair dryer works as a substitute but delivers less focused heat. The risk with a heat gun: too much heat in one spot can permanently distort or melt the film, and excessive heat near paint can cause damage.
Trimming Knife
For edge work only. This tool exists in the DIY PPF world with a giant asterisk. Every experienced installer warns against cutting on the paint. The correct approach is to let the pre-cut template handle your edges, using the knife only for minor adjustments off the car or on areas where the film overlaps a non-paint surface.
Dust-Free Environment
PPF is a high-transparency material. Any dust, hair, or fibre trapped between the film and the paint will be clearly visible. Professional shops use filtered-air, climate-controlled booths. A home garage with the door closed is acceptable but far from ideal. Run a wet mop over the floor before you start, mist the air with water to settle dust, and avoid installing on windy days. This is one area where the DIY Model 3 PPF experience will always lag behind a professional result.
Cost and Decision Terms
DIY PPF Cost vs Professional Installation
Here are the real numbers, based on current market pricing:
|
Coverage Level |
Professional Install (USD) |
DIY Kit (USD) |
|---|---|---|
|
Full vehicle |
$4,000 to $7,000 |
$1,500 to $2,200 |
|
Full front (bumper, hood, fenders, mirrors) |
$1,400 to $2,500 |
$500 to $1,200 |
|
Partial front (bumper + partial hood) |
$600 to $1,500 |
$200 to $500 |
Sources: DIY Wrap Club, carlikewrap.com
Professional installation costs roughly three times more than DIY. For Australian buyers, one Tesla Owners Australia group member reported paying $5,850 AUD for a bundled package including tinting, PPF, headlight smoking, interior protection, and ceramic coating. Australian DIY kits start from approximately $295 AUD for a full bonnet kit from local suppliers like Paintgard.
The savings are real. The question is whether the result justifies the savings.
If you are weighing protection options more broadly, the guide on PPF versus ceramic coating breaks down when each makes sense.
Film Brand Tiers and Warranty Durations
Not all PPF is created equal. Kit sellers often offer multiple film options at different price points. Using Paintgard’s Australian lineup as an example:
-
Economy tier (e.g., Progard Next Gen): 5-year warranty. Adequate basic protection, but thinner and may yellow faster.
-
Performance tier (e.g., 3M Series 100): 7-year warranty. Better clarity, stronger self-healing, improved hydrophobic properties.
-
Elite tier (e.g., 3M Scotchgard Series 150): 10-year warranty. Top-tier optical clarity, the best self-healing, and the longest lifespan.
Paying more for film is almost always worth it. The labour (your time) is the same regardless of film quality, and cheap film that yellows or peels after three years means doing the job twice.
Labour Warranty (What You Lose With DIY)
Professional installs typically include both a film warranty (from the manufacturer) and a labour warranty (from the shop). If the film peels, bubbles, or yellows within the warranty period, the shop reinstalls it at no charge. With DIY, you keep the film manufacturer’s warranty (covering defects in the material) but lose the labour warranty entirely. If your install fails because of technique, that is on you.
Seam Lines (Multi-Piece vs Single-Piece Bumper Kits)
The Model 3’s front bumper is large and has complex curves. Most pre-cut kits split the bumper into multiple pieces for easier installation. This creates visible seam lines where the pieces meet. Practitioners on Reddit note that multi-piece front bumper kits are the main cosmetic downside of DIY PPF on a Model 3, though one user with a Tesbros kit acknowledged it “looks fine” from normal viewing distance if the seams are aligned carefully.
Single-piece bumper templates exist but demand far more skill to install. They are the default for professional shops and the reason pro results look cleaner.
DIY PPF Kit Brands for Model 3
Several companies sell pre-cut Model 3 PPF DIY kits. Here are the major options:
|
Brand |
Film Used |
Model 3 Variants |
Ships to Australia |
Notable Feature |
|---|---|---|---|---|
|
DIY Wrap Club (formerly Tesbros) |
Avery Dennison Supreme Defense |
2017-2023 + Highland |
Yes (international shipping) |
Includes video course guide |
|
Drive Protected |
Proprietary “Defense+” |
2017-2023 + Highland |
Yes |
Step-by-step YouTube tutorials |
|
Paintgard |
Progard / 3M Series 100 / 3M Scotchgard 150 |
Multiple variants including Highland |
Australia-based, free domestic delivery |
Three film tiers with 5/7/10-year warranties |
|
Abstract Ocean |
Various |
Highland + pre-Highland |
Yes |
Full body and front kits |
Most kits include the pre-cut PPF panels, slip solution concentrate, tack solution, a squeegee, microfibre cloths, and written instructions. You will typically need to supply your own heat gun, spray bottles, clay bar for paint decontamination, and isopropyl alcohol for a final surface wipe.
Common DIY Mistakes on Model 3
Even with pre-cut kits, Model 3 PPF DIY installs go wrong in predictable ways. Knowing these ahead of time helps you avoid them.
Front bumper wrinkles. The Model 3 bumper has compound curves that punish insufficient heat application. Film that is not stretched enough wrinkles. Film that is overstretched becomes thinner and shortens its lifespan. Finding the sweet spot takes patience and practice.
Dust contamination. This is the most common complaint from DIYers. A single hair trapped under the film on the hood is visible from metres away. You cannot match the filtered-air environment of a professional booth in a home garage, but you can minimize contamination by wet-mopping floors, misting the air, and working in clean clothes.
Edge lifting. If edges are not properly heated and sealed with tack solution, they can lift over time, especially in hot climates. South East Queensland summers accelerate this problem. Run a heat gun along every edge after squeegeeing and press firmly.
Paint damage from cutting. Using a blade on the car’s surface is the fastest way to ruin a DIY install. One slip scores the paint. That scratch requires repainting, and a repainted panel never wraps as cleanly. Stick to pre-cut templates and do any necessary trimming off the car.
YouTube tutorials from Drive Protected and others demonstrate that even experienced DIYers take two to four hours per panel. The Highland’s redesigned bumper in particular requires different technique than the pre-facelift car. Budget a full weekend for a full-front install.
Aftercare Terms
Curing Time
After installation, the adhesive needs 24 to 48 hours minimum to fully bond with the paint. During this period, do not wash the car, expose it to rain if possible, or touch the film edges. Some installers recommend a full week before the first wash.
Ceramic Coating Over PPF
A ceramic coating can be applied on top of cured PPF to add an extra layer of hydrophobic protection and UV resistance. The PPF’s clearcoat layer is specifically designed to accept ceramic coatings. This combination, PPF for impact protection plus ceramic for chemical and UV resistance, is considered the gold standard of paint protection. For help deciding between the two (or understanding why both together make sense), the ceramic coating or PPF decision guide explains the trade-offs.
PPF Yellowing
Budget films and older-generation films can yellow over time, especially with UV exposure. Quality modern films (3M Scotchgard Series 150, XPEL Ultimate Plus, and similar) include UV stabilisers that resist yellowing for the duration of their warranty. This is another reason to buy premium film: on a white Model 3, yellowed PPF is painfully obvious.
For ongoing care instructions, see the guide to cleaning paint protection film.
When to Call a Professional Instead
Model 3 PPF DIY works well for certain situations and falls apart in others. Be honest with yourself about which camp you fall into.
DIY makes sense for: Door cups, door edge guards, trunk ledge, headlights, and flat or gently curved panels like the roof or the upper portion of the hood. These are forgiving surfaces where pre-cut kits deliver results close to professional quality. Recharged.com notes that DIY kits are best for small areas or owners who accept some cosmetic flaws in exchange for significant savings.
Professional installation makes sense for: The front bumper (compound curves, multi-piece seam management), full-body matte or satin PPF (requires seamless coverage across every panel), and any new or high-value vehicle where you want a film and labour warranty. Professional shops deliver cleaner edges, fewer seams, better pattern fit, and accountability if something goes wrong.
For Model 3 owners in the Gold Coast area who want professional PPF, Gold Coast Wrap Kings’ PPF service page details the available options. The team works regularly with Teslas and other EVs, handling sensor-safe installations on vehicles where precision around cameras and ultrasonic sensors matters. You can also browse their EV-specific portfolio to see completed Model 3, Model Y, Model X, and BYD projects.
If you want to discuss your Model 3’s specific needs or get a quote, reach out directly here.
FAQ
Australian DIY kits start from approximately $295 AUD for a single panel (like a full bonnet kit) from suppliers like Paintgard. A full front kit ranges from roughly $500 to $1,200 USD depending on the brand and film tier. Full-body kits run $1,500 to $2,200 USD. Compare that to $4,000 to $7,000 USD for a professional full-body install.
No. The Highland has completely redesigned front and rear bumpers, different headlight shapes, and no fog lamp cutouts. Every major kit seller lists separate products for the Highland (2024+) and the pre-Highland (2017 to 2023). Always verify your model year before ordering.
A hair dryer works as a substitute but is less effective. It produces lower, less focused heat, which makes it harder to conform the film around compound curves like the front bumper. For flat panels and door cups, a hair dryer is adequate. For bumpers and fenders, a proper heat gun makes a noticeable difference.
The front bumper, without question. Its compound curves require aggressive heat and stretching, and most pre-cut kits split it into multiple pieces that create visible seam lines. Practitioners on Reddit consistently recommend starting with easier panels (hood, door cups) to build confidence before attempting the bumper.
Budget two to four hours per panel for a first-time installer. A full front (bumper, hood, fenders, mirrors) can easily take an entire weekend. YouTube walkthroughs from Drive Protected and others show that even experienced DIYers work methodically through each section.
Pre-cut kits for first-timers, every time. The consensus across Tesla forums and Reddit is unambiguous on this point. Bulk rolls offer better edge coverage and lower per-metre cost, but they require cutting on the car, which risks scoring Tesla’s thin paint. That damage is permanent and requires repainting.
Yes. Once the PPF has fully cured (at least 48 hours, ideally a week), you can apply a ceramic coating directly on top. The PPF’s clearcoat layer is designed to accept ceramic coatings. The combination provides impact protection (PPF) plus chemical and UV resistance (ceramic), which is the most complete paint protection setup available.
It depends on your goals. DIY PPF on a Model 3 saves roughly 60 to 70 percent compared to professional installation and delivers perfectly acceptable results on flat panels, door cups, and headlights. For compound-curve panels like the front bumper, full-body matte finishes, or if you want a labour warranty, professional installation is the better choice. Many owners take a hybrid approach: DIY the easy panels and pay a pro for the bumper.